More Duratec Madness
By Joe Arico
PART 1 – December 2016
As most of you will have read in the club magazines, Mike Moore and I have been busy putting Duratecs into our Elises. You may know Mike’s install well from all the great articles he’s written. While our builds use common components, they do differ quite a bit. The most essential ingredient though is the same – they are both built by a couple of car nuts in a shed.
After 18 months of work the car has been a runner now for about 4 months. The first couple of months were painful, sorting out teething issues with the tune. Fortunately, I did get it ready for the final round of the QLD Super Sprints in September (literally the night before!). It was a baptism of fire for the car but I’m glad to report that it survived a 400km round trip to the track and competed all weekend without issue. I even came away with a trophy.
So, let’s rewind back to the beginning. One of the biggest goals when I set out to do the conversion was to be able to retain the air conditioning. In the 8+ years I’ve owned the Elise I’ve put a lot of time into getting the AC to work effectively. I wasn’t going to let all that work go to waist! Besides, if you realistically want to use the car in summer in QLD you really don’t have a choice.
It very quickly became apparent that keeping the AC wasn’t going to be easy though. It was clear I was going to have to think outside the box and do something a bit different. The only way I could fit everything in was to move the alternator to the back of the engine and run it on a shaft. The AC compressor was easy – a standard Mazda 6 compressor bolts straight up to the engine block. I wasn’t making life easy for myself but I was determined not to give up on the idea and give it a go! I just had to make sure that everything else I did supported this design goal.
While I worked out what to do with the AC it also became clear (to both Mike and I) that the partial “kit” purchased out of the UK was not engineered to the level required. Most of the components supplied were good quality but the mounts put the engine in a position that was most definitely going to be problematic. To get acceptable clearance around the front of the engine they needed to be redesigned. This is where the project suddenly got a lot more complicated!
It’s worth saying at this point that when I set out to design all these parts I had none of the CAD skills required. I have a long engineering background but I had never used a 3D design package before. However, I had always wanted to learn. I was fortunate to have access to such a package through my work. It was a steep learning curve but after some head banging I eventually got the hang of it. It really is amazing what you can do with the technology available today!
I was also fortunate to have a good friend at work with a 3D printer so I prototyped many of the parts in plastic before committing to manufacturing in aluminum. After a bit of careful measuring I ended up redesigning the mounts to lower the engine 13mm in the car. This may not sound like a lot but it made a massive difference.
Anyway that’s where I’ll sign off for this issue. I’ll leave you with some pictures of early prototype plastic mounts. Happy and safe Xmas to all!
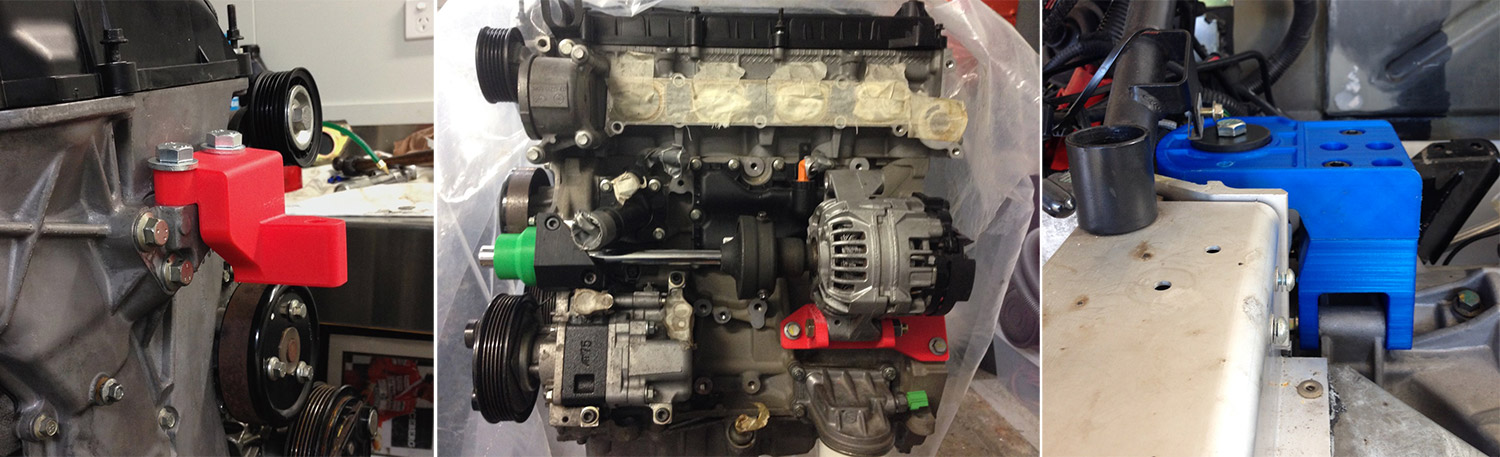
L-R: Front mount, alternator relocation, gearbox mount.
PART 2 – June 2017
Firstly, apologies for the long delay between Parts 1 and 2. Have 6 months really passed? I can’t believe it.
I signed off last time having shown the plastic prototype brackets I printed to trial fit all the components. The next stage was to find a reputable machine shop to make my prototypes become a reality.
It’s very difficult to find someone that will take on this “one off” low volume kind of work. RAGE (Race & General Engineering) on the Gold Coast were happy and keen to help. I have to say that on an overall scale from 1 to 10 of all the suppliers I dealt with on the project (with 10 being the highest of course) RAGE score a 10 in my book. They did excellent work, communicated well and for the majority of my parts provided a very fast turnaround. I simply supplied the design files and a 2D dimensional drawing and on average, a week later the parts would show up.
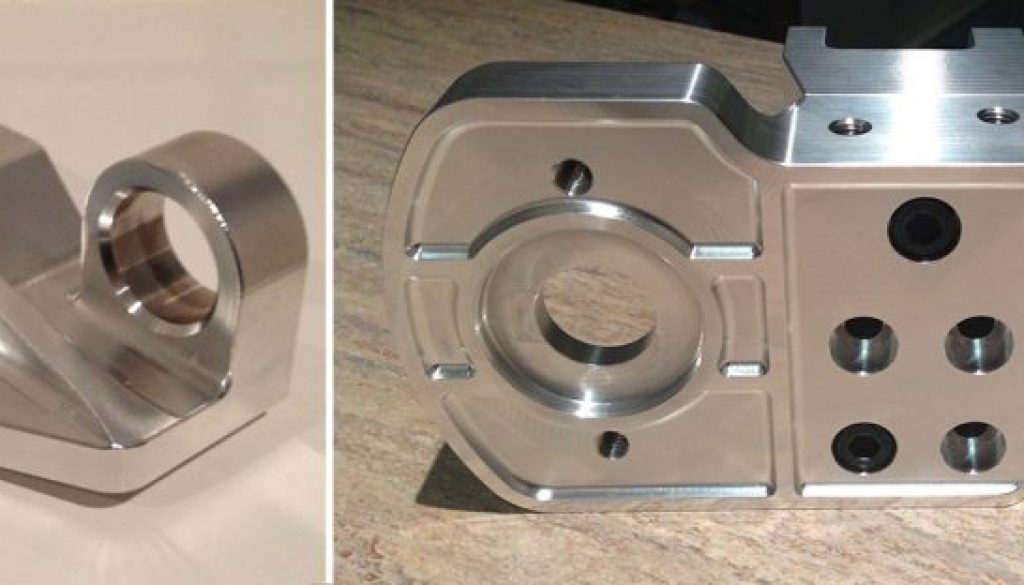
Unpacking the first package revealed something much “prettier” than I was expecting! Pictured below (right) is the front engine mount and gearbox mount prior to anodizing. A few weeks later after a bit of careful design the final engine mount showed up (shown at left).
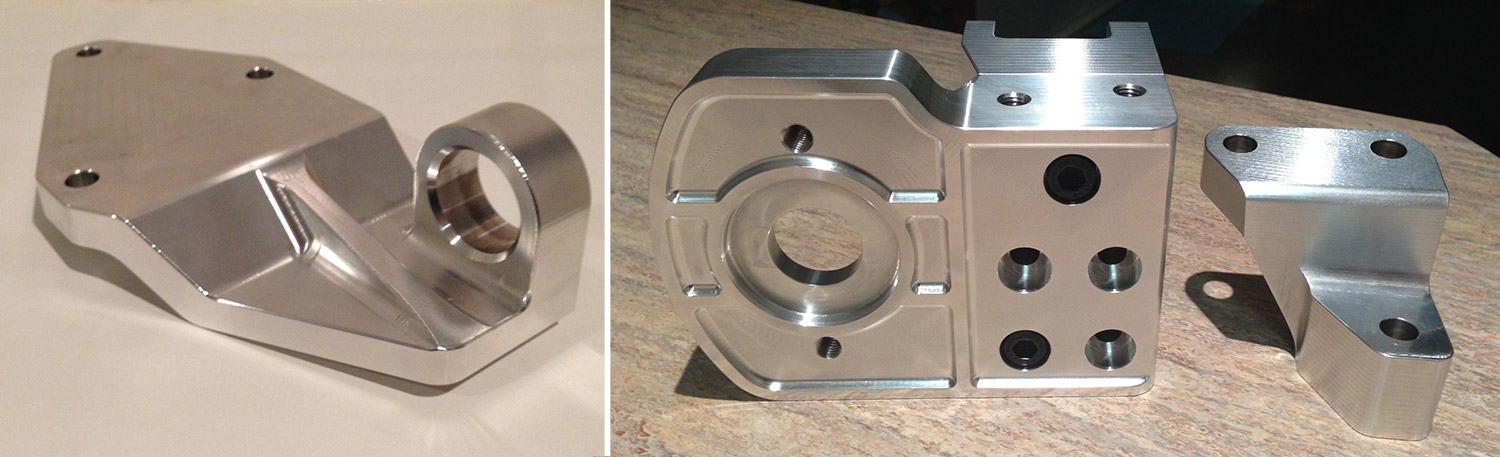
L-R: Final engine mount, front engine mount & gearbox mount prior to anodizing.
It’s worth mentioning at this point that a lot of effort went into ensuring the mounts did not preload (i.e. twist) the rubber isolators. This ensures you get the best vibration isolation possible and on that front, I can report that the car doesn’t feel any different to the original K series with the harder mounts I was running.
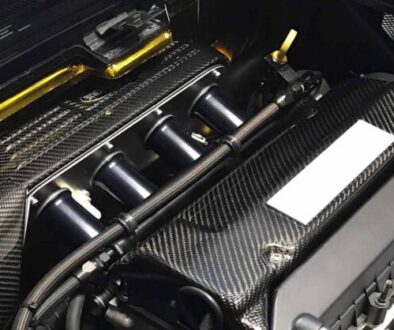
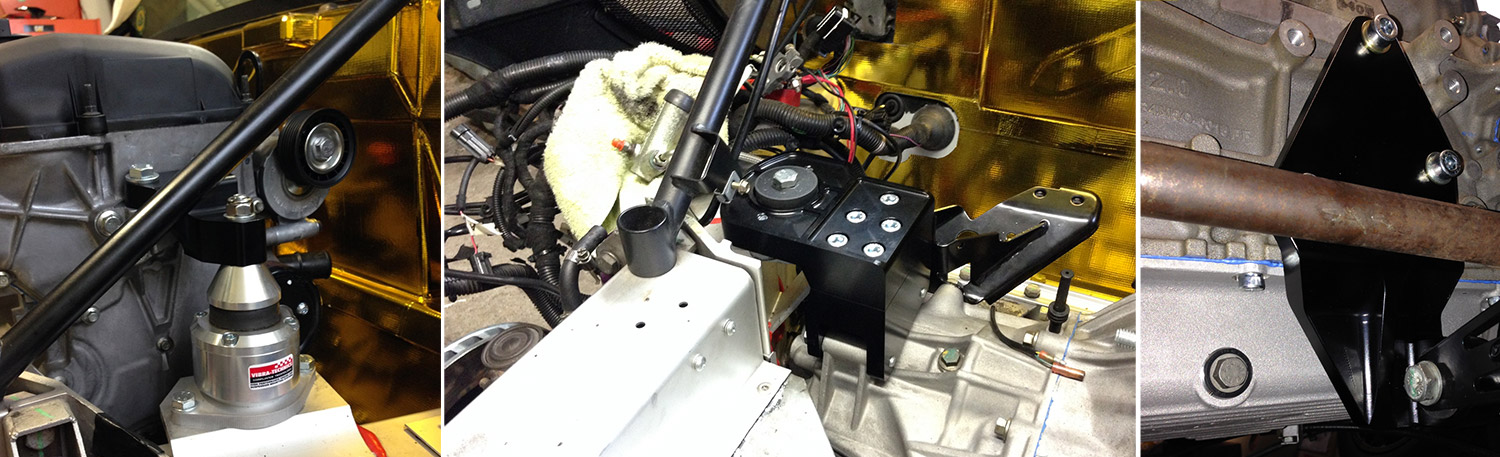
Remaining true to my original intentions I will continue to try and tell the story with pictures. The following shots show the final parts installed.
In Part 3 I will go into more details on the air conditioning parts – by far the most challenging section of the project.
That’s all for now. Thanks for reading!